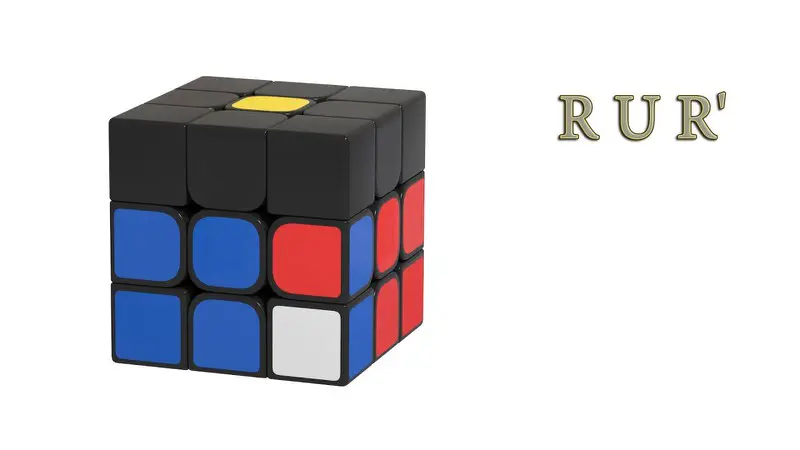
A Tutorial on Solving F2L in Three Steps
F2L is the second step of the CFOP method (Cross, First 2 Layers, Orientation, Permutation) for solving the Rubik's Cube. We assume you have already mastered the CROSS, so let's continue. 🚀
Important note: the standard method starts with the white base, but in practice, after scrambling, you may already have a nearly solved red or green cross. Take advantage of that - the algorithms work for them as well.
This is a tutorial for solving it step-by-step and provides answers to your questions - what, where, how...
It will allow you to more easily understand and intuitively solve F2L (the first two layers). Later, from the multitude of algorithms available to solve this step faster, you can choose the ones that suit you best.
The solving process is divided into three steps, covering all 41 possible distinct cases, and does not disturb the previously solved pieces.
F2L Step One: Preparation
This is done based on the needs of the specific situation. It consists of moving pieces from the first and/or second layer into the top layer and separating adjacent pieces if their colors are not correctly matched. Whether you should first separate the pieces and then move them, or vice versa, depends on the specific situation, which is usually obvious.
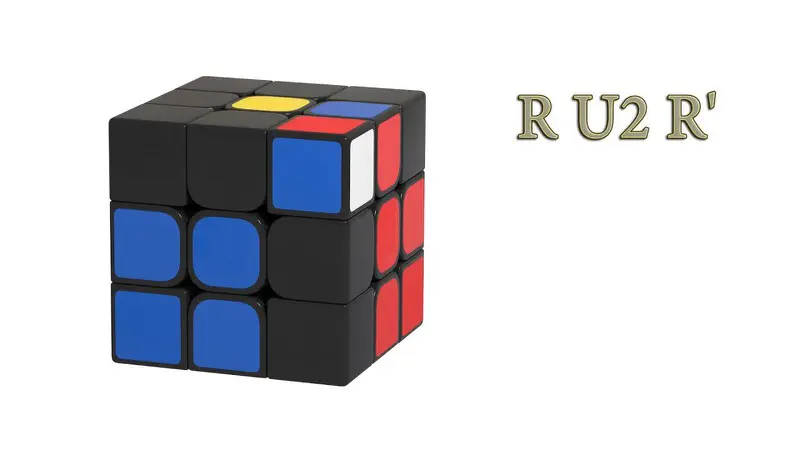
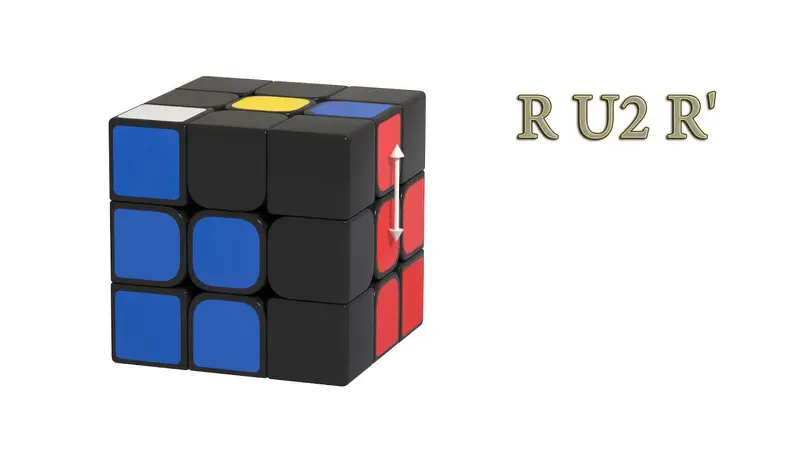
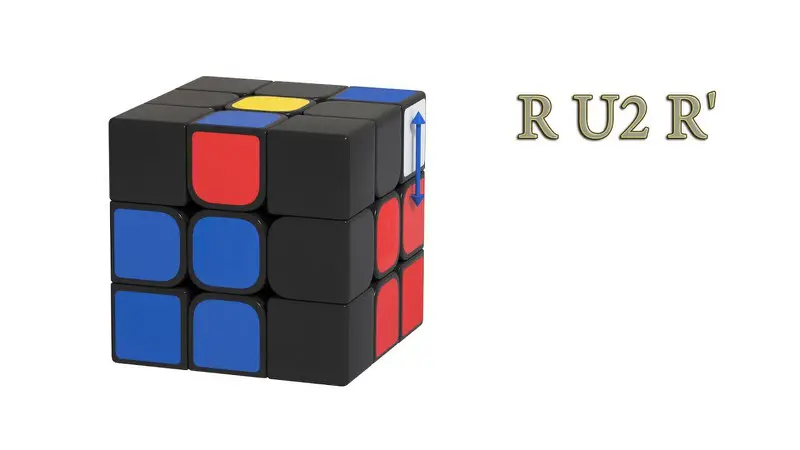
First, watch the video animation of the move:
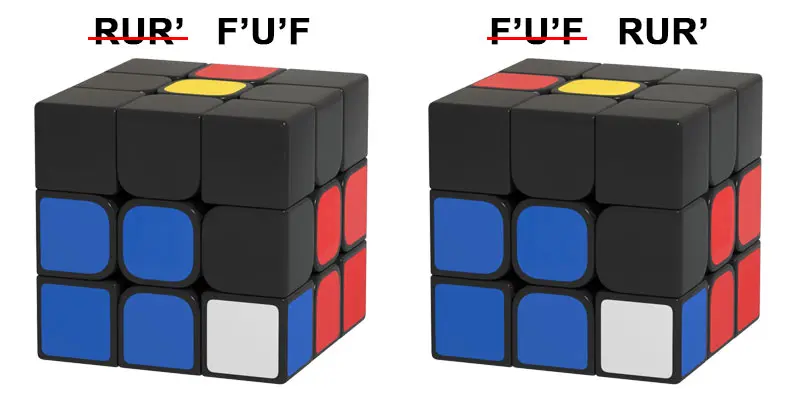
The principle is simple: by turning the right face (R), the pieces are brought to the top layer. We then rotate the top layer (U) to move the pieces out of the way of the right face, and then we turn the right face back (R') to restore the white cross we just disturbed.
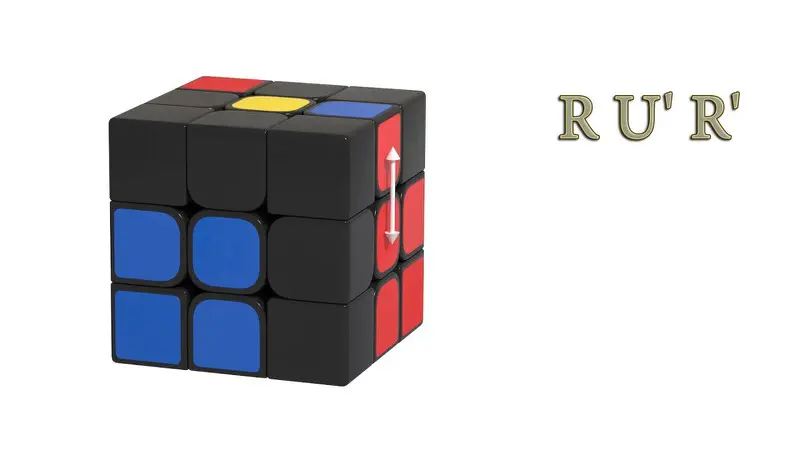
If it suits you in a certain situation, you can also use the symmetrical algorithm F' U' F. This is a hint that symmetrical algorithms are also used in this method.
Of course, in practice, there are different starting positions, so let's consider some limitations.
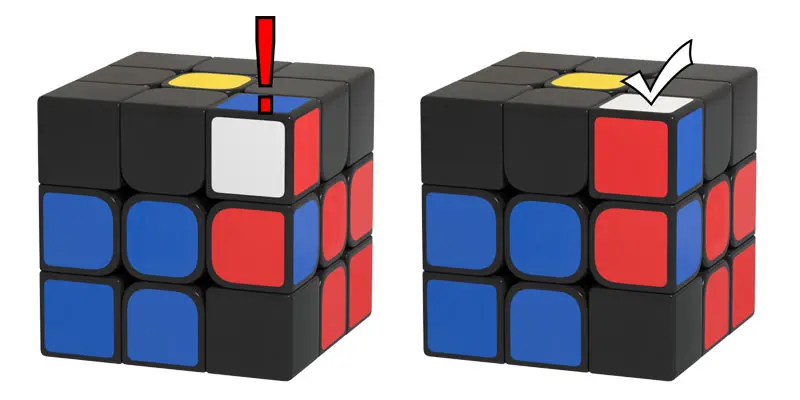
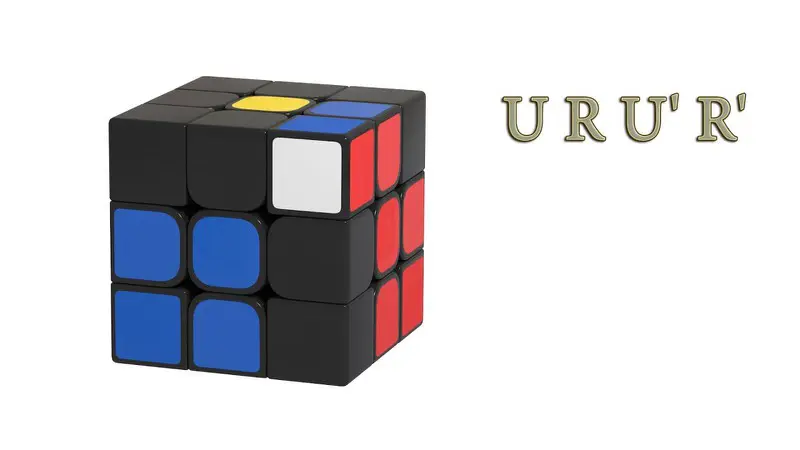
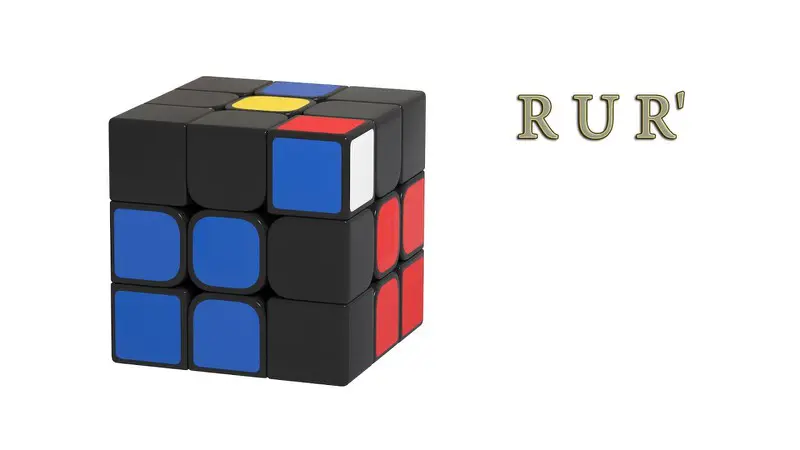
First of all, a white corner in the front-up position is generally an unacceptable spot because the algorithms R U R' and F' U' F would move it into the first layer. If it's not already in any other position, move it. However, in the case of a formed pair as shown in the previous image, the algorithm R U' R' is ideal for bringing it up to the top layer.
For the same reason, you should move the edge piece or choose an appropriate algorithm for the edge positions in the next image. The remaining two positions are completely acceptable for both algorithms.
In practice, pieces can appear in different slots, so the process of raising them to the top layer is repeated.
Now let's deal with separating pairs with mismatched colors. Take a look at the next video:
Bring the white corner above the empty slot of the matching colors. Depending on whether the connected edge is on the right or left side, raise the corresponding face, rotate the top layer twice (U2), and then turn the face back to restore the white cross. Of course, U2 is not the only option, but in practice, it provides the best positioning for the next step.
F2L Step Two: Pairing
(Forming the pairs)
Here, you will find descriptions and animated examples of how to form correct pairs and open pairs, ready to be inserted into an empty slot.
There are only 3 possibilities:
- White sticker on top, and
- Same colors on top form a pair;
- Different colors on top are set up into an open pair, ready for insertion with the algorithm R U R' or F' U' F.
1. White on Top
(Pairing the edge piece)
In this situation, we rotate the top layer until we match the colors of the edge piece with its corresponding center color (if it's not already in that position). After matching, we raise that face and clear the way for the white corner to meet the edge piece (with a U / U', or U2 turn as in our example). Finally, we turn the face back, which restores the white cross.
2. Same Colors on Top
(Pairing the white corner)
In this situation, the white corner is important for pairing with the face that has the opposite color of the sticker on top of the corner. By moving that paired face (the right face back or the front face to the left), we clear the path for the edge piece to move to the back or the left side.
We turn the face back, the pair is formed, and the white cross is correct again.
After this, you will need to perform a U2 turn before inserting the pair into its slot in the next step.
3. Different Colors on Top
(Pairing the edge piece)
By rotating the top layer, we match the colors of the edge piece with the center of the same color (if it's not already in that position). If this is on the right side, we raise that face (R), turn the corner (U') – the white sticker appears on the front; then we turn the right face back (R').
For matched colors on the front face, we use the symmetrical algorithm F' U F, which makes the white sticker of the corner appear on the right side.
After this, you can freely bring the white corner to the front-right position and you will be ready for Step 3.
F2L Step Three: Inserting the pairs into their slot
These are algorithms you've known for a long time, also called "the lucky cases".
There's no need to explain these, as you've gone through them more than a hundred times in the second step of the LBL method for solving the Rubik's Cube, and we believe you will repeat them at least a thousand more times while practicing the CFOP method for a competition ahead of you.
In any case, for further progress, a multitude of algorithms is available to you on the Speedsolving.com Wiki.
We've presented a system that was developed with great enthusiasm by Caleb Miller, on whose YouTube channel you can find more analyses and suggestions for segments of the CFOP method. We hope this will be useful to many Rubik's Cube enthusiasts, at least in the beginning.